Planning and facilitating remote workshops has become indispensable in times of lockdown and social distancing. As a digital creative agency, we have been able to work fully remote from day one of the pandemics. When I say fully, this doesn't include the workshops and co-creating sessions that we do because we prefer the hands-on and face-to-face approach for some formats, especially with externals and clients.
Direct proximity facilitates, for example, getting to know each other or the onboarding process and discussing a new topic. We had to learn that remote collaboration with people of different organizations, mindsets, and digital work experience can be challenging. There are many great articles and templates on facilitating remote workshops for workshop-experienced participants. But we had to learn that not everybody is willing or capable to jump right into a remote workshop setting. And in our experience, this digital capability is not only related to age but rather to day-to-day workflows. Therefore, we had to take a step back and think about digital workshops. Especially to be able to involve key opinion leaders and senior managers fully.
To make the imparted knowledge directly actionable, we offer you a Miro template as a blank framework for intuitive workshop processes. It is a skeleton, so to speak, which incorporates all your content into a user-friendly structure, that is easy to fill in and clear to understand, and user-friendly, even for inexperienced whiteboard participants.
Set low digital barriers to ensure digital inclusion
Especially when we are doing remote workshops for the first time in an organization, we always allow participants to take part only by video call, meaning we type and navigate on their instructions on the digital whiteboard. This ensures that barriers are rather low, insecurities or embarrassments do not arise in the first place, and every participant has the chance to participate independently of their internet connection, digital communication skills, and tool knowledge. We used Miro in combination with video call software like Teams or Zoom. After welcoming participants, we introduce the Miro whiteboard and its basic functions. In this way, everybody can see the workshop space and follow the content even when they are not able to navigate on the board.
Tip: Preparation is key for remote workshops. Make sure you explicitly communicate what participants can expect from your digital workshop beforehand (for example, in an onboarding email). Think about camera usage, continuous participation, and browser/device to be used – chrome is almost always the safest choice here). Do not overwhelm participants, provide information subsequently. Invite participants with the video call link in the invitation together with a rough agenda, and indicate which browser should be used. That is essential for their participation. Then share in the video call the link to the workshop space. At best, all information is summarized in this one workspace.
2in1: Simply integrate existing content and allow a hybrid workshop setting
During the pandemic, we have designed in-person workshops and meetings, which we then had to implement remotely at short notice. The structural flexibility to switch without a problem between analog and digital is currently of great advantage. The reasons for a hybrid workshop design might vary: some participants might be physically present, others are remote, or at a later stage, only remote-gatherings are feasible, etc.
We learned that it is wise to think about these two settings beforehand to start preparations again from scratch. We use ‘frames’ in Miro that we fill with content that is prepared in standard presentation tools like PowerPoint. Furthermore, we use data export solutions of Miro to transfer (post-it) content to Excel.
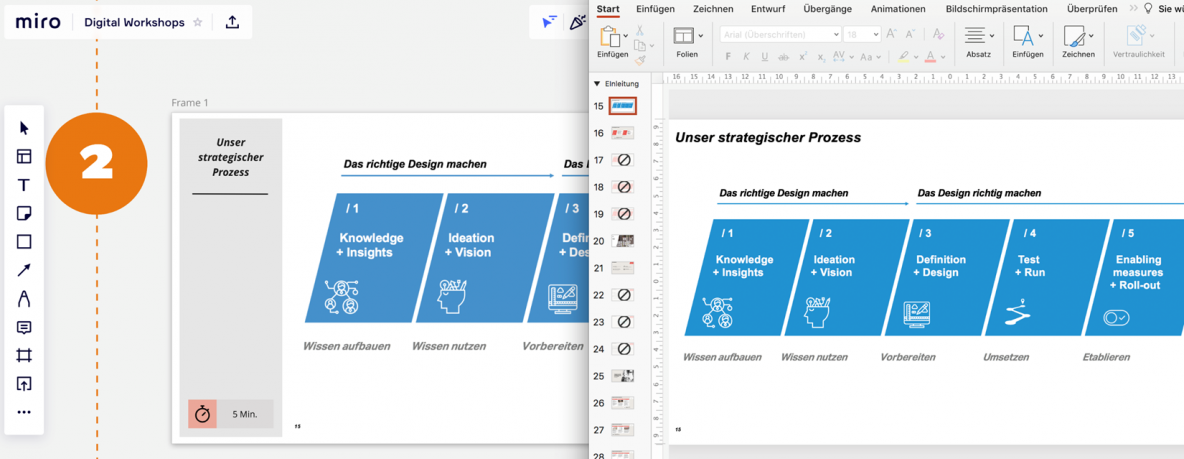
Tip: Use your preferred presentation tool (e.g., PowerPoint) and integrate already laid out pages into Miro. We have prepared these placeholder frames for you in our Miro template. Like this, you can quickly prepare your content, and your preparation can be used for in-person, as well as for virtual workshops. Make yourself familiar with the data import and export functions of the tools. The documentation of the workshop can be done just as quickly because the formats of the layouts are uniform. You can find more on this in the next section.
Design your workshop space by providing guidance and an overview
Digital whiteboards are infinite, and the options to design a creative workshop space can be easily overwhelming. We prefer to provide a workshop space that guides participants ‘step by step’ through the process: starting with the purpose of the workshop, to the results and its evaluation. Each step is located along one thread/timeline, that structures the entire workshop. In our experience, a vertical layout in the reading direction is more intuitive than a horizontal one. During the workshop, participants move forward on this main axis, cultivating a sense of progress and continuity. If you get lost on the board, you can easily orientate yourself and quickly find the red thread again.
The large and color-highlighted numbering helps to communicate and identify the steps. For each step, we provide a title, a description, a goal, and a duration (time indication). In this way, we provide ‘visual evidence’ of all the information that we give during our moderation, and we ensure that this information is accessible to everyone throughout the workshop.
It sounds simple – but it is probably not yet self-evident. Even in the co-creation of large conferences, we have made the experience that working with infinite whiteboards is still unfamiliar for both sides (both facilitators and participants).
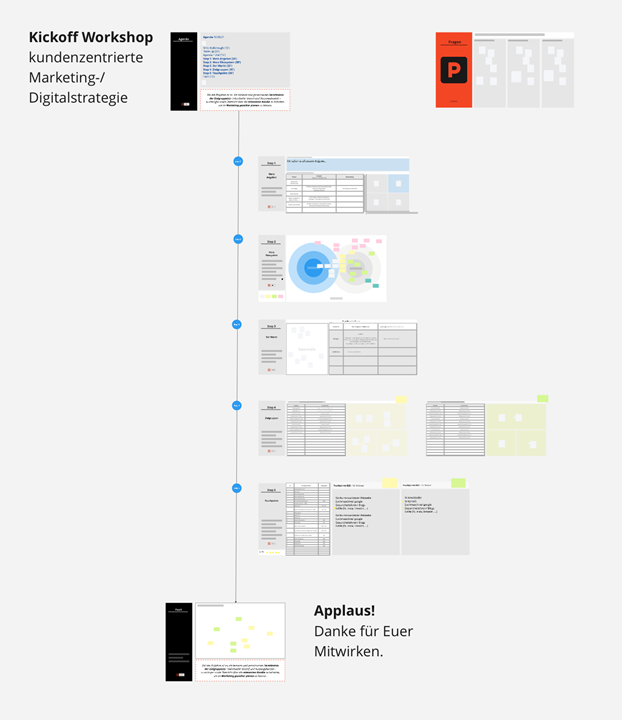
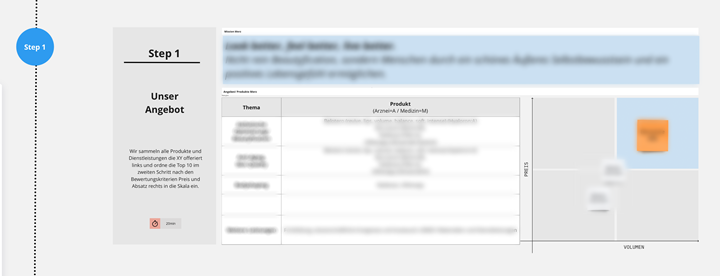
Tip: Provide a structured, understandable and intuitive timeline to navigate digital workshop space that easily allows participants to understand at which step of the process they are and what is expected from them. Remember: sometimes less is more. Create ‘visual evidence’ of your moderation efforts on the board by providing a detailed description for each step. Especially as workshops tend to last several hours and the concentration level gets low, it is important to provide information that participants can access whenever they need to.
Facilitation & Moderation during the workshop
Having participants in the workshop that do not actively participate on the board makes it necessary to work with 2 facilitators: one that moderates and shares the screen and one that documents (types onto the board). This role distribution should be the standard for every interactive workshop, even if it requires more resources. This ensures that also those voices will be heard that usually would not be able (or willing) to participate digitally. By repeating workshops with the same team, we see that participants' activity increases significantly over time. However, for the very first time, you need to make them participate at the lowest barriers possible.
When breaking out into small working teams, we do this by using breakout sessions of the video call software tool (like Teams or Zoom) and group breakout-sections (horizontal behind each step) in the Miro board. Similar to the plenary workshop, we work with sub-moderators in the breakout rooms/threads, especially when tasks need to be done on the digital whiteboard.
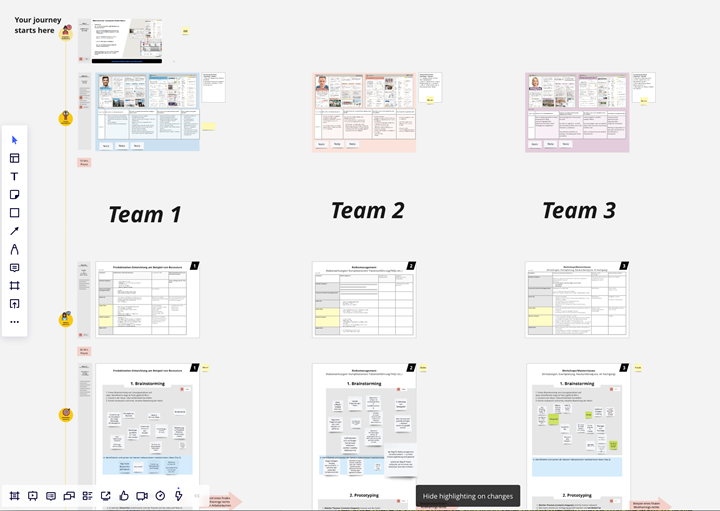
Tip: Work with co-moderators that can help you to document, but also troubleshoot technical issues and questions during the workshop. Yes, it does consume a lot of resources, however, it is worthwhile to obtain an optimal outcome.
Breakout rooms: Make sure the main host remains in the central room so that participants that lose the connection can be placed back into their working group quickly.
Workshop methodologies integrated from the Miroverse
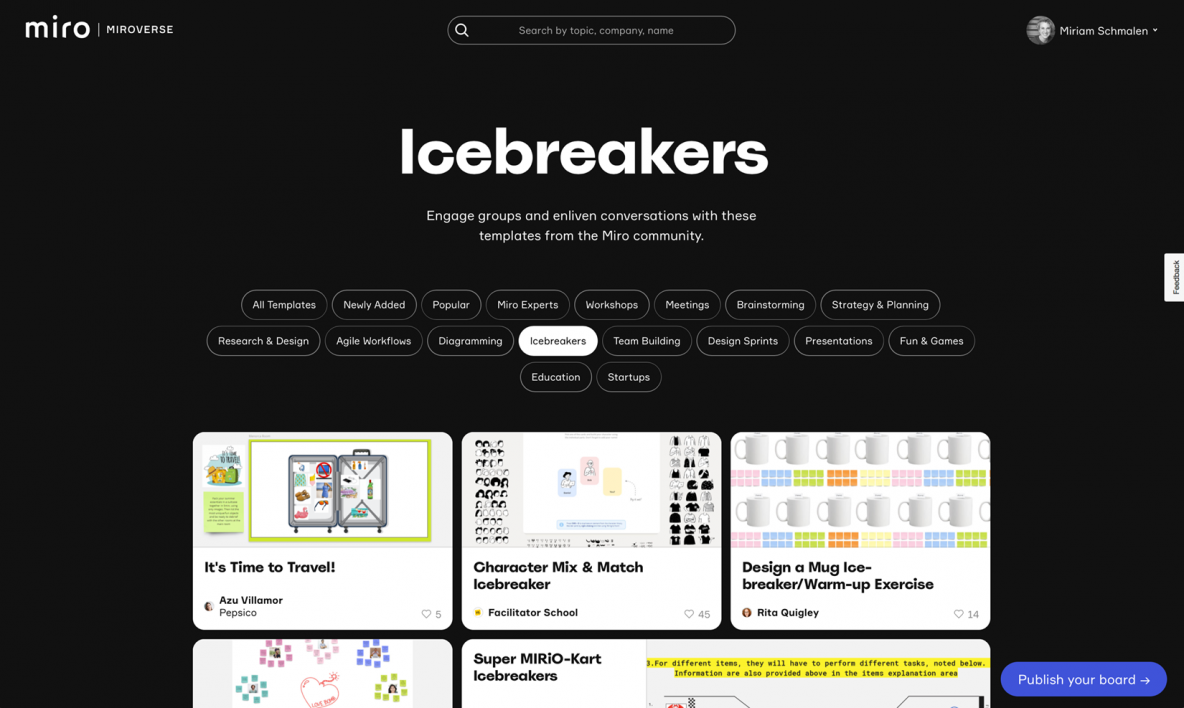
Warm-up activities are a great way to learn how to use Miro's workshop space, as they are fun, connective, and encourage trial and error. They get participants into the right mood mentally as well as digitally. However, it is unlikely that participants with limited digital skills and a non-collaborative working culture will participate fully in a digital workshop, even after 15-minute ice-breaker activity. For any methods like an ice-breaker, warm-ups, and energizers, we would like to refer you to the Miroverse. Our blank frames also offer space for integrating Miroverse templates. We have not integrated them into our board ourselves because there is such a diverse and great selection in the Miroverse that we want to leave the choice of a suitable method to you.
What is not yet a cultivated standard, but what we consider methodically important, is "idea parking". Here we have set up an “idea parking area” to the right of the main thread. In addition to the fact that important ideas are not accidentally lost in this way, this approach has two other major advantages: Concerns are noted and find their space to be dropped
but do not disrupt the ongoing process. An important step is, that this area gets jointly reviewed at the end of the workshop.
“Open Closing” & Workshop Documentation
After the workshop, we keep the board (better: a copy of the board) open and allow participants to give feedback, recap, and rework their activities. Keep in mind that it is not only a lack of tool skills that makes some participants more passive during (online and offline!) workshops. Also, their inhibition can keep them from openly sharing their thoughts with their colleagues on a shared board. Regarding this inhibition, the possibility of protected rework is a great advantage for live workshops. Participants profit from extra time and space without peer pressure. Leaving the workshop space open is also an opportunity to give people the chance to share the results or workshop experience at a later stage with people that could not be present.
More commonly, customers want a summary, often an explanatory document, to document the workshop. Their wish is that this document explains the steps the team has taken and documents the results so, that everyone can understand/recap. At this point, the work with our frames becomes very efficient and handy again as we can easily export them into PowerPoint or PDFs: in the correct format, with a description of the step and visual documentation of the results obtained.
Tip: Always make a copy of the board after the workshop or after giving participants time to rework their tasks at a later stage.
Workshop documentation: Use the board export function to create a PDF, and include this in your preferred documentation format so that the workshop results are used in your and the client's organization.
We hope that we provided you with some useful tips and hints for executing digital workshops in a hybrid setting with specifically low entry barriers. Here you will find the blank workshop template in the Miroverse, which we have discussed in this article: Your free Mirboard
Note that we also created templates for our in-depth user research video interviews. As always, we would be happy to receive your feedback on these different issues.


